The integration of DoorBird devices with HomeKit allows you to control and monitor your video doorbells and smart locks from your Apple devices. Although DoorBird doesn’t natively support Apple HomeKit, you can easily connect it using HOOBS (Homebridge Out Of the Box System). HOOBS enables a smooth connection between your DoorBird devices and Apple HomeKit, offering centralized control and automation within your Apple ecosystem. This guide will walk you through the process of adding and using DoorBird devices with Apple HomeKit.
Steps to Configure HOOBS for DoorBird Integration
To begin, connect the HOOBS device to power. When the red LED lights up, it indicates that the device is powered on. Use an Ethernet wire or WiFi connection to connect HOOBS to your network. Once connected successfully, the LED should turn green.
1. Download the HOOBS App: Go to the official HOOBS website and download the app for your computer.
2. Login: Open the HOOBS Client app and log in by entering your credentials. Then, pair your HOOBS device with the app.
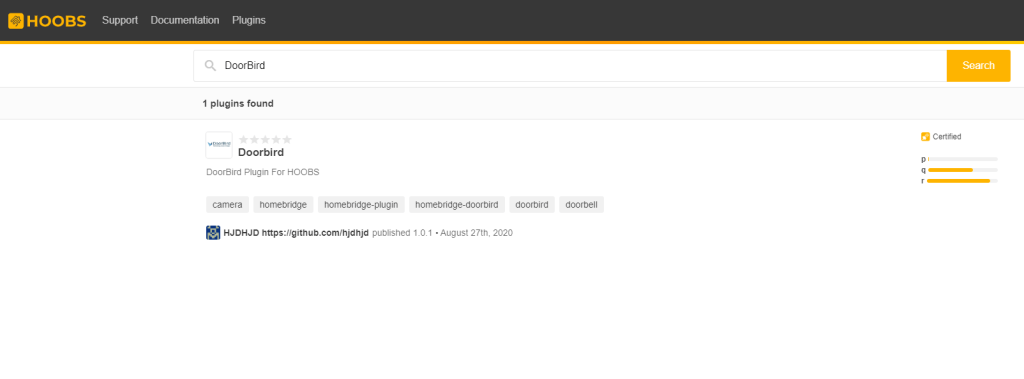
3. Navigate to Plugins: In the HOOBS Dashboard, locate and click on the Plugins tab to access the available plugins.
4. Search for the DoorBird Plugin: Use the search bar to find the DoorBird plugin and select it from the search results.

5. Click Install: Hit Install to add it to HOOBS. Once done, click Configuration.
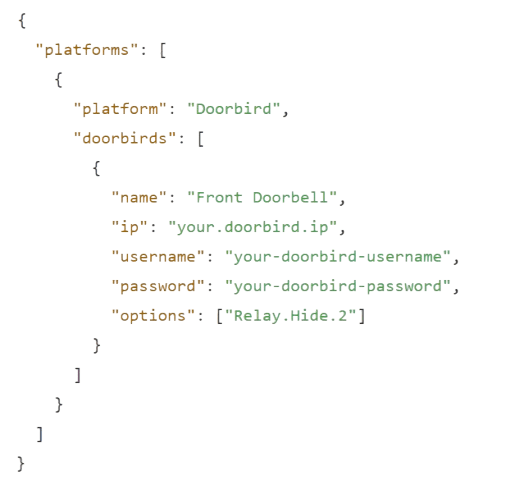
6. Enter Configuration Details: You will need to type the IP address, username, & password for each device. You can also add optional settings, such as configuring relay options.

7. Save the Configuration: After entering the necessary details, save the configuration and restart the HOOBS device. This will apply the changes and ensure the devices are added correctly. Now, the website will show a HomeKit QR Code.
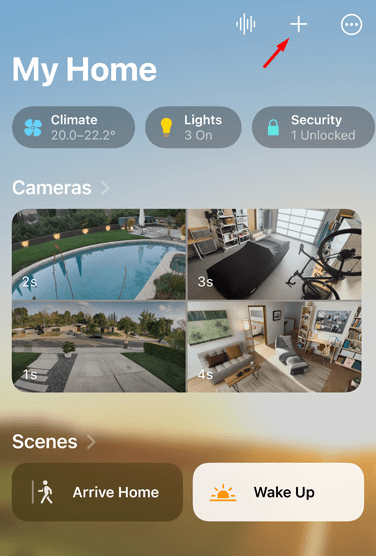
8. Access the Home App: Open the Home app and hit the + icon.

9. Add Accessory: Select Add Accessory and scan the code shown on the HOOBS plugin page generated for your DoorBird devices.
10. Assign Device Name and Location: Follow the on-screen instructions to assign a unique name and location to your DoorBird device. You can set specific room locations and names for easier identification.
Once you’ve completed the setup, tap Done to save the configuration. Now, your DoorBird devices are successfully integrated with HomeKit.
Benefits of Adding DoorBird to HomeKit
Integrating DoorBird with HomeKit offers several advantages, which are given below.
- Seamless Integration: Control your DoorBird devices through the Home app, Siri, or any HomeKit-enabled devices.
- Remote Access: Manage your devices from anywhere, including viewing live feeds and unlocking smart locks.
- Automation and Scenes: Create custom automations, like turning on lights and unlocking the door when you arrive home.
- Siri Integration: Use voice commands with Siri to interact with your devices hands-free.
- Enhanced Security: Benefit from Apple’s encrypted data storage and secure authentication features for added privacy.
FAQ
DoorBird does not require a subscription for basic features but offers optional subscription plans for advanced features like cloud storage.
You can’t integrate the DoorBird into the HomeKit if the DoorBird plugin isn’t correctly installed or configured in HOOBS.
