Bticino devices are a stylish and practical enhancement to any smart home. Integrating them with HomeKit improves convenience, energy efficiency, and remote control, all with smooth Siri integration. You can easily connect Bticino devices to HomeKit using the Home + Control app or the Home app. For devices that are not natively compatible, you can use HOOBS to add them to HomeKit. This article will guide you through the steps to integrate your Bticino devices into Apple HomeKit.
Steps to Integrate Compatible Bticino Devices to HomeKit
The integration process for Homekit-compatible Bticino devices is straightforward and can be done via Home + Control or the Home app.
HomeKit-compatible Bticino Devices: Living Now Smart Switches, Livinglight with Netatmo, Classia with Netatmo, and Smarter with Netatmo Thermostats.
Home + Control App
1. Download Home + Control: Get the Home + Control app on an iPhone from the App Store and sign in using credentials.
2. Start Configuration: On the Configuration page, select Start and hit the Bticino option.
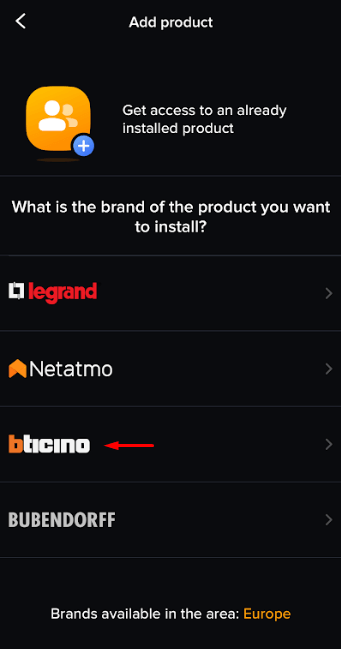
3. Choose Accessory: Pick your device from the list and pair it by following the instructions shown. Press Next.
4. Setup the Devices: Enable permission and connect it to WiFi.
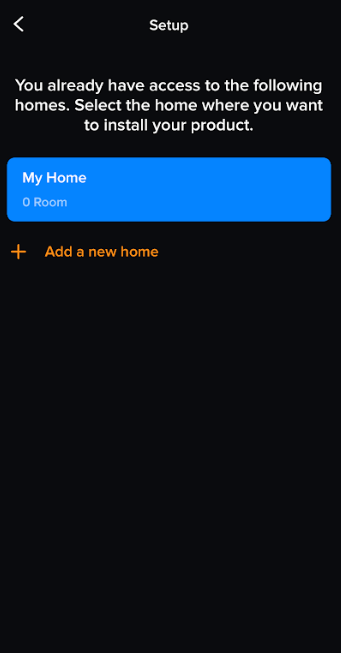
5. Select Home: Follow the on-screen instructions. Choose your home or + Add a new home.
6. Locate HomeKit Code: Find and scan the HomeKit QR code on your Bticino device, or select “I can’t find my HomeKit code” for guidance.
7. Finalize Integration: Enter the respective configuration details to complete the setup.
Home App
1. Home App: Open the Home App on Your iPhone/iPad and tap the + icon.
2. Scan QR Code: Select Add Accessory and scan the HomeKit Code. Use the QR code or manually enter the HomeKit code if scanning isn’t possible.
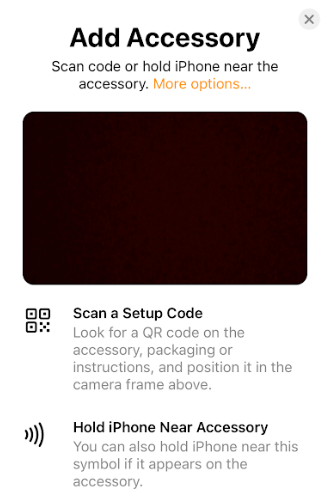
3. On-Screen Instructions: Follow the prompts to configure and name your device.
4. Finalize the Process: Then, assign the rooms and other details. Finally, press Done to complete the process.
Steps to Add Bticino Devices to Apple HomeKit via HOOBS
If your Bticino devices aren’t natively compatible with Apple HomeKit, you can use HOOBS (Homebridge Out Of the Box) to add them to the Home app.
1. Download HOOBS: Install the HOOBS app on your PC from their official website and log in.
2. Navigate to Plugins: In the HOOBS Dashboard, click on the Plugins tab and look for the Bticino plugin.
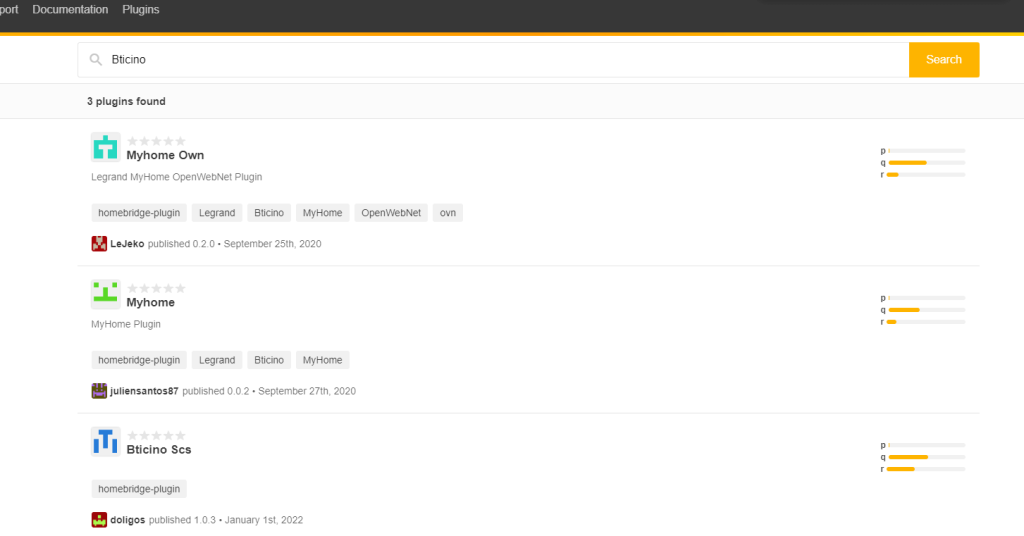
3. Install the Plugin: Click on the Bticino plugin and hit Install. Once installed, navigate to the plugin to configure it.
4. Enter Configuration Details: Input the IP address of your Bticino device and any required authentication credentials.
5. Save Configuration: After entering the details, save the configuration and restart your HOOBS device.
6. Open Home App: Open the Home app and hit the + icon.
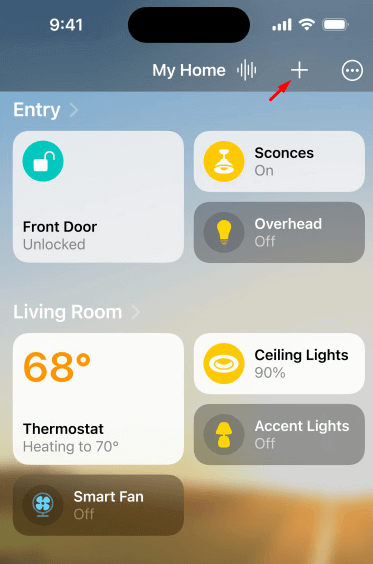
7. Add Accessory: Tap on Add Accessory to Add Bticino HomeKit and scan the QR code shown on the HOOBS plugin.
8. Assign Device Name and Location: Follow the prompts to name your Bticino device and specify its location within your home.
9. Press Done: Complete the setup by pressing Done. You can now control your Bticino devices using the Home app or Siri.
FAQ
Yes, you can add incompatible devices to HomeKit via the Easykon bridge.
