Adding the Uber Driver app to Android Auto can enhance your driving experience, offering easy access to key features right on your car’s display. Whether you are a new driver or an experienced one, integrating Uber Driver with Android Auto allows you to accept trip requests, navigate routes, and view heatmaps without relying solely on your phone. In this guide, we will explain the steps to add the Uber Driver app to your car’s Android screen and how to use it effectively.
Steps to Add Uber Driver to Android Auto
1. Get the Uber Driver App: Install the Uber Driver app from the Google Play Store on your Android smartphone. Once installed, sign in to your Uber Driver account.
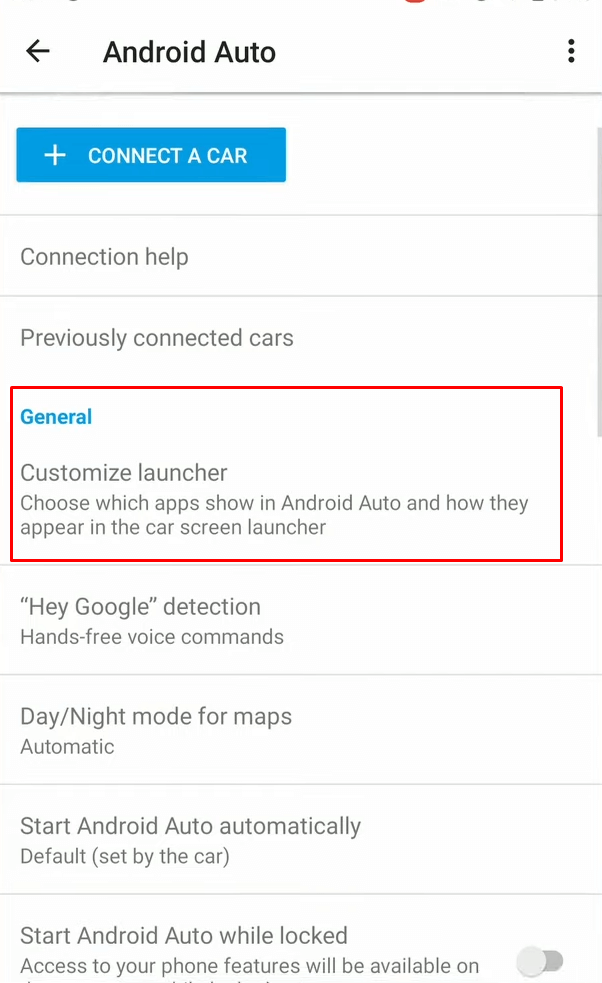
2. Open Android Auto from Settings: Navigate to the Settings menu on your Android and use the search bar to find Android Auto.
3. Customize the Launcher: In the Android Auto settings, click on the Customize Launcher option under General Settings.

4. Select Uber Driver: Scroll through the app list and checkmark the box next to Uber Driver to add it to your Android Auto launcher. For older Android devices using the Android Auto app, open the app, go to General Settings → Customize launcher, and checkmark the box next to Uber Driver to add it to your screen.
5. Organize the Launcher: To move the Uber Driver app to the first page, drag the app using the dots icon to the top of the list.
6. Restart Android Auto: If your smartphone is already connected to Android Auto, restart Android Auto to see the changes. If you are not, link your phone to your car’s Android either wirelessly or with a USB cable and verify that the Uber Driver app appears on the interface.
How to Use Uber Driver App on Android Auto
After installing the Uber Driver app and adding it to your car’s Android screen, you can start using the app by following the steps mentioned below.
1. Sign Up for Uber Driver: If you are a new user, you need to sign up on Uber Driver’s official website to become a driver. You will need to submit personal and vehicle documents and complete an online driver screening test.
2. Go Online on Uber Driver: To start driving, sign in to your Uber Driver app on your Android phone. Press the GO button to go online and start receiving trip requests. On Android Auto, you can accept or decline trips, view navigation, and use the heatmaps. However, you will need to use your phone to switch between online and offline modes.
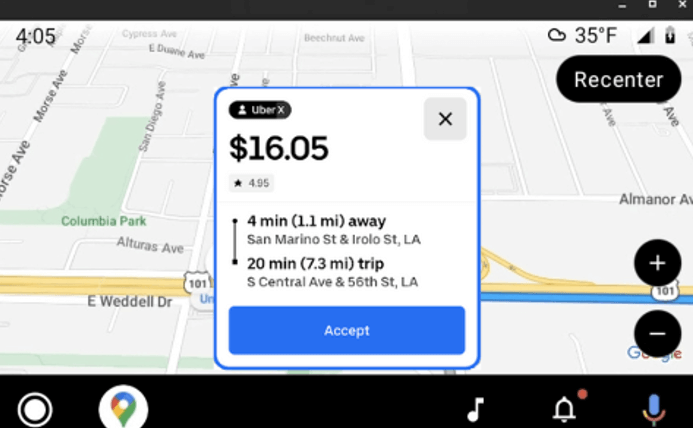
3. Get a Trip: Once you are online, your current location and nearby high-demand areas (heatmaps) will appear on the Android Auto screen. When a trip request comes in, tap Accept to start the ride or Decline to cancel. After accepting, you will see trip details like pay, customer info, distance, and ETA. Then, you can click Navigate to begin the trip.

4. Complete the Trip: During the ride, you can follow the navigation instructions on the Android Auto screen, which will show the next direction, ETA, and remaining distance. Once the trip is complete, you’ll receive payment for the ride.
5. Go Offline: To stop receiving trip requests, open the Uber Driver app on your phone and click Offline. You will then be marked as unavailable for new trips.
FAQ
If the Uber Driver app isn’t functioning on the Android Auto interface, try restarting both your smartphone and vehicle. Ensure that the Uber Driver app on your smartphone is updated to the latest version. If the issue persists, remove the Uber Driver app from Android Auto’s menu and add it back.
No. Trip cancellations cannot be done through the Android Auto screen. To cancel a trip, you’ll need to use the Uber Driver app on your smartphone.
To change the navigation provider, open the Uber Driver app on your Android phone. Navigate to the Accounts tab, choose Preferences, and then select your preferred mapping service for turn-by-turn directions.
