ORVIBO has several smart home devices that can work with the ORVIBO Home app but are not compatible with Apple HomeKit. However, if you own ORVIBO products that support Matter Standard, such as the MixPad D1, Smart Mini Hub, and Smart Dimmer Switch, you can integrate them using the Apple Home app. For incompatible devices, you can use the HOOBS bridge. This guide shows the steps for integrating the ORVIBO devices into Apple HomeKit.
Steps to Add Matter-Compatible ORVIBO to Apple HomeKit
1. Install and Set Up ORVIBO Device: Begin by setting up the MixPad D1 or Smart Dimmer Switch according to ORVIBO’s instructions. Once installed, power on the device and navigate to its settings.
2. Locate the Matter QR Code: On the device settings, look for an option labeled “Add to App.” Selecting this option should display a Matter QR code, which you will need to scan for pairing. If setting up a device for the first time, the QR code may appear automatically during the setup.
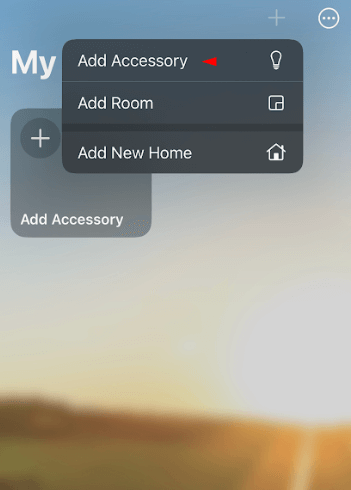
3. Open the Apple Home App and Begin Adding the Device: Open the Home App on your iPhone. Tap the + icon in the upper-right corner and select Add Accessory.

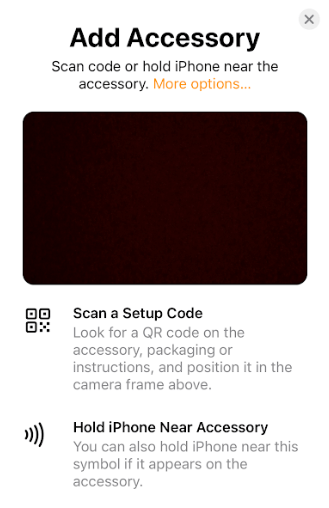
4. Scan the Matter QR Code: Use your phone’s camera to scan the QR code displayed on your MixPad D1 device. For the Smart Dimmer Switch, you can find the Matter QR code on the product itself or in the user manual.
5. Complete the Setup: After scanning, the Home app will prompt you to assign a room for the device. Choose a room, rename the device if desired, and tap Continue to complete the setup.
6. Finalize the Connection: Once added, the device should appear in your Home app and is now ready for control through Apple’s platform.
Steps to Add Incompatible ORVIBO Devices to Apple HomeKit
If your ORVIBO device isn’t natively compatible with Apple HomeKit, you can integrate it using HOOBS (Homebridge Out Of the Box) to make it accessible through the Home app.
1. Download HOOBS: Get the HOOBS app on your computer from the official HOOBS website and sign in using your account credentials.
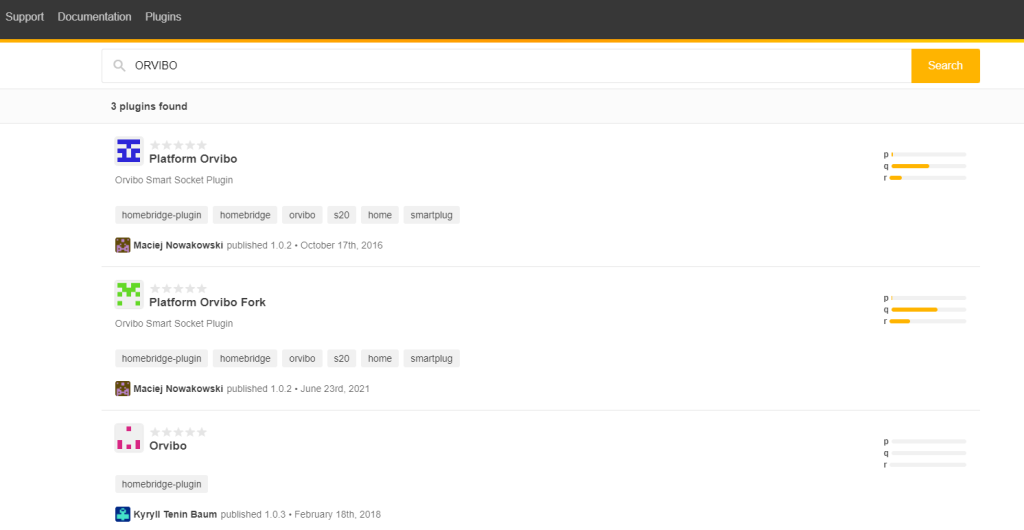
2. Access the Plugins Section: In the HOOBS Dashboard, click on the Plugins tab to search for compatible plugins.
3. Search for ORVIBO Plugin: Use the search bar to find an ORVIBO plugin or a generic plugin that supports ORVIBO devices.

4. Install the Plugin: Select the plugin, click Install, and wait for the installation to complete. Once installed, click on the plugin to configure it.
5. Enter Configuration Details: Input the details required to set up the ORVIBO device.
6. Save Configuration: After entering the necessary details, save your configuration settings, then restart the HOOBS device to ensure all settings are applied.
7. Open the Home App: Open the Apple Home app and press the + icon.
8. Add Accessory: Select Add Accessory and scan the QR code generated for your ORVIBO device on the HOOBS plugin page.

9. Assign Device Name and Location: Follow the prompts to name your ORVIBO device and specify its location in your home for easy management.
10. Complete Setup: Press Done to finalize the setup. Your ORVIBO device is now available for control within the Home app and can also respond to Siri commands.
FAQ
Yes, you can use Siri commands to control the ORVIBO devices.
